Gmail Thinks I’m Stupid, So I Segmented My Home Lab—and Here’s Why You Should Too
A practical deep dive into network segmentation for home lab security — real examples, comparisons, and setup guides.
Gmail Thinks I’m Stupid, So I Segmented My Home Lab—and Here’s Why You Should Too
A few weeks back, a viral post titled Gmail thinks I’m stupid, so I left hit the moral of the story squarely in my face: trust is eroding in the cloud, and you’re the one who has to protect the last mile. If you’re like me, you’re tired of hearing problems get pushed up the stack to “we’ll fix it later” or find out your tokens, credentials, and private data are a single misconfigured click away from leaking into someone else’s hands. The home-lab reality is this: a segmented network isn’t a luxury; it’s a necessity. And if you’re serious about security in a small, self-hosted environment, you start with segmentation.
That sentiment lands harder when you consider recent tech news and misconfig risks that blur the line between “dev machine” and “production-ish”. For example, the 1-Click GitHub Token Stealing via a VSCode Bug reminds us that credentials can be exfiltrated from developer machines with minimal fault tolerance. If your home lab runs Git repos, CI runners, or secrets in the same flat network as your personal devices, you’re inviting trouble. I’ve slowly rebuilt my lab around isolation boundaries, not because I’m paranoid, but because I’m practical. Segmentation raises the bar for every service I run—from media servers to test sandboxes—and it doesn’t require a giant budget, just intention and a plan.
In this piece, I’ll lay out why segmentation matters in a modern home lab, how to design a practical three-zone topology, and give you concrete, hands-on steps you can implement this weekend. I’ll anchor the discussion with current context—why trust in cloud services is fraying and how a misbehaving editor or token can pivot from “nice-to-have” to “must-have” in minutes—and finish with a concrete example you can copy-paste or adapt.
Why segmentation matters in today’s landscape
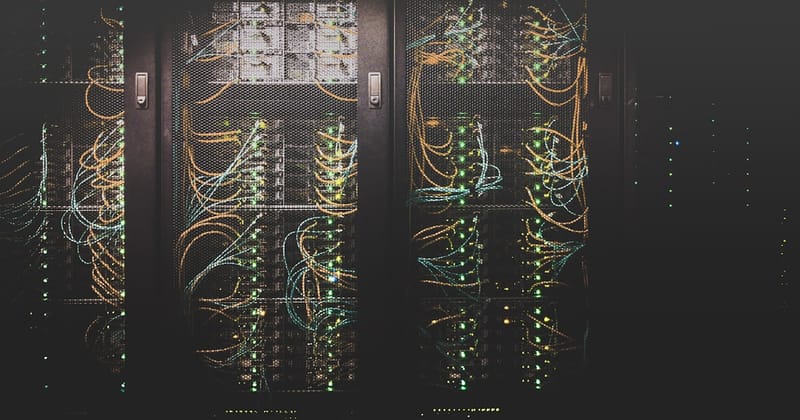
Segmentation is not a buzzword you pretend to understand while you set up a dozen VMs in a flat network. It’s a defense-in-depth technique that limits how far an attacker can travel after a compromise. In my own lab, a single misconfiguration, a compromised IoT device, or a stolen local token can become a ladder into more valuable assets—docker registries, private APIs, or even a dev laptop with SSH keys.
- Cloud trust is fraying. The Gmail article I mentioned highlights a wider distrust in cloud services’ ability to keep data private and access-safe. If you rely heavily on cloud-backed identities, credentials stored on devices still matter. A segmented network reduces the blast radius when a device is compromised, regardless of the provider.
- Developer workflows carry risk. The VSCode-token incident shows how secrets can be compromised on workstations. Home-lab networks that let dev machines talk directly to your home services increase exposure risk when a token leaks.
- AI and automation introduce new vectors. As AI-assisted tooling takes on more coding and deployment tasks, secrets get pulled into local shells and editor sessions. Without segmentation, a compromised workstation or plugin can reach your services, bypassing simple “trust but verify” checks.
- IoT remains a soft target. From cameras to smart speakers and hobbyist boards, IoT devices are notorious for weak defaults. Segmentation makes it so an IoT device can talk to the internet but not to your admin server or sensitive data stores.
If you want to protect yourself from tokens wandering across the network, or from a botnet-powered IoT breakout, segmentation is your first firewall. It’s also one of the few things you can implement with modest hardware and a weekend’s worth of work.
A practical topology: three zones that actually work
In a home lab, I don’t run a single flat network with a dozen services shouting at each other. I design for risk: keep high-privilege management separate, isolate critical services, and limit IoT/guest devices to their own lane. A three-zone model hits the sweet spot for most hobbyists:
- Zone A — Admin/Management (10.0.10.0/24): your laptop, admin consoles, the NAS hosting backups, and management interfaces for your hypervisor or container orchestrator. This is the most trusted space; anything here should be able to reach the Internet, but not arbitrary devices in other zones unless absolutely necessary.
- Zone B — Workloads/Servers (10.0.20.0/24): your Docker hosts, VM hypervisors, CI runners, your private Git repos, media servers, and any services you actually expose to other machines. This is the “production-ish” zone for your home lab.
- Zone C — IoT/Guest (10.0.30.0/24): printers, cameras, smart bulbs, guest wifi, and anything that is low-trust or untrusted. This zone should never be able to reach Zone A or Zone B unless a controlled exception exists (e.g., a dedicated management interface with strict rules).
You’d route traffic between zones through a firewall you control (pfSense/OPNsense, a Linux box with nftables/iptables, or a capable consumer router that supports VLANs and firewall rules). You’ll block unsolicited inbound access from Internet to internal zones, but you’ll allow outbound connections as needed, typically with stateful rules and strict egress policies.
I won’t pretend you can implement a single rule to “make everything safe.” Segmentation is about patterns: default deny, allow essential flows, and log the rest. It’s a work in progress that pays off when you intentionally segment, test, and iterate.
How to implement: two practical pathways
There are multiple ways to achieve segmentation, depending on budget, hardware, and appetite for networking complexity. Here are two common, repeatable approaches:
- Path 1: Use a dedicated firewall appliance (pfSense/OPNsense) with VLAN support
- Pros: Clear UI, robust firewall features, easy VPN configuration, strong community support.
- Cons: Hardware cost (even a reused PC or an Old Xeon box can do), learning curve if you’re new to network firewalls.
- Path 2: Use a Linux box with nftables (or iptables) as the edge firewall
- Pros: Cheap, flexible, scriptable, perfect for a homelab.
- Cons: You’ll manage rules manually; less plug-and-play UI; need to ensure NAT, routing, and DNS are all correctly configured.
I’ll walk you through the Linux-nftables approach with a concrete, copy-paste-ready example. If you’re using pfSense/OPNsense, you can translate the same zones and rules into firewall aliases and firewall rules in their UI.
A concrete, copy-paste example: three zones on Linux with nftables
This example creates three internal subnets (Admin, Workloads, IoT) and applies basic isolation rules. You’ll need a Linux box with at least two network interfaces: one connected to the Internet (via your ISP router/modem) and one connected to a switch that serves the internal zones. You can also run this on a VM with bridged networking.
1) Define subnets (adjust to your environment)
- Admin: 192.168.100.0/24
- Workloads: 192.168.101.0/24
- IoT: 192.168.102.0/24
- Firewall box: 192.168.1.1 (LAN interface)
2) Install nftables (if not present)
- On Debian/Ubuntu: sudo apt-get update && sudo apt-get install -y nftables
- Enable on boot: sudo systemctl enable nftables
- Start: sudo systemctl start nftables
3) Create the basic ruleset
Code (save as /etc/nftables.conf and load with nft -f /etc/nftables.conf)
# Define interfaces
# eth0 = external (to Internet via router)
# eth1 = internal switch carrying VLANs for Admin/Workloads/IoT (tagged or untagged depending on your switch)
#!/usr/sbin/nft -f
flush ruleset

define ADMIN_NET = 192.168.100.0/24
define WORK_NET  = 192.168.101.0/24
define IOT_NET   = 192.168.102.0/24
define LAN       = 192.168.1.0/24

table inet filter {
    chain input {
        type filter hook input priority 0; policy drop;
        iifname "lo" accept
        ct state established,related accept
        # SSH from Admin network only (adjust port if you use a different admin port)
        ip saddr $ADMIN_NET tcp dport 22 accept
        # Allow ICMP (optional, for ping)
        ip protocol icmp accept
    }

    chain forward {
        type filter hook forward priority 0; policy drop;

        # Allow established/related connections
        ct state established,related accept

        # Admin -> Workloads is allowed; but restrict Admin to admin/workload hosts explicitly
        # Example: allow Admin to access Admin and Workloads, but not IoT
        ip saddr $ADMIN_NET ip daddr $ADMIN_NET accept
        ip saddr $ADMIN_NET ip daddr $WORK_NET accept
        # Drop Admin from talking directly to IoT unless explicitly allowed
        ip saddr $ADMIN_NET ip daddr $IOT_NET drop

        # IoT should generally not talk to Admin or Workloads
        ip saddr $IOT_NET ip daddr $ADMIN_NET drop
        ip saddr $IOT_NET ip daddr $WORK_NET drop

        # Workloads to Admin allowed (management), to Internet allowed
        ip saddr $WORK_NET ip daddr $ADMIN_NET accept
        ip saddr $WORK_NET ip daddr 0.0.0.0/0 accept
        # IoT to Internet allowed (restricted),
        ip saddr $IOT_NET ip daddr 0.0.0.0/0 drop
        # DNS/NT P helpers (adjust to your DNS/NTP servers)
        # Example: allow DNS from IoT if required (prefer you block  IoT from DNS)
        # ip saddr $IOT_NET udp dport 53 accept
    }

    chain output {
        type filter hook output priority 0; policy accept;
    }
}
4) Enable IP forwarding and NAT if you’re routing to the Internet
# Enable routing
sudo sysctl -w net.ipv4.ip_forward=1
# NAT for outbound from internal subnets
sudo iptables -t nat -A POSTROUTING -o eth0 -s 192.168.100.0/24 -j MASQUERADE
sudo iptables -t nat -A POSTROUTING -o eth0 -s 192.168.101.0/24 -j MASQUERADE
sudo iptables -t nat -A POSTROUTING -o eth0 -s 192.168.102.0/24 -j MASQUERADE
5) Load the nftables ruleset
sudo nft -f /etc/nftables.conf
Notes:
- This is a starting point. You’ll tweak allowed paths as you add services. For example, if you run a private Gitlab or a repo runner on Workloads, give it explicit access and log everything else.
- You’ll want to concretely map what devices sit in each subnet (e.g., admin laptops in Admin, a VM host in Workloads, cameras in IoT) and adjust the rules to permit only the necessary flows.
- Logging is critical. Add a separate logging chain to record blocked traffic so you can audit later.
Docker and Kubernetes add another layer of segmentation inside the Workloads zone. Here’s a quick note on containers:
- Use separate Docker networks for different services and define firewall rules between them if you’re exposing services. If you want a quick start without a full firewall, you can at least isolate containers at the network layer and ensure they don’t talk to the IoT subnet unless needed.
Docker networks quick-start (optional)
docker network create --driver bridge --subnet 172.20.10.0/24 adminnet
docker network create --driver bridge --subnet 172.20.20.0/24 worknet
docker network create --driver bridge --subnet 172.20.30.0/24 iotnet

# Run containers in their own networks
docker run -d --net adminnet --name admin-box nginx
docker run -d --net worknet --name app-server -p 8080:80 nginx
docker run -d --net iotnet --name cam-node --restart unless-stopped some-camera-image
Then block cross-network traffic at the host firewall (as above) or on your pfSense/OPNsense if you’re using a dedicated firewall box.
This is a simple, pragmatic example. If you want to see a more production-ready set of rules, you can model after a small enterprise-grade tiered firewall, but you don’t need that for a home lab. Start with the three zones, enforce default deny, and iterate.
A quick comparison: three common paths to segmentation
Here’s a quick look at the main options you’ll run into, with a few practical trade-offs.
| Option | Pros | Cons | Ideal for |
|---|---|---|---|
| pfSense/OPNsense on a hardware box or Raspberry Pi cluster | Rich UI, VPN, IDS/IPS, easy VLANs, strong community support | Hardware cost, some initial setup time | Hands-on firewall controls, quick GUI-based rules, VPNs for admin access |
| Linux box with nftables/iptables | Cheap, highly customizable, scriptable, integrates with existing servers | CLI-centric, steeper learning curve for firewall design | You want tight integration with your Linux hosts and containers; you enjoy scripting |
| Consumer router with VLAN support | Simple, low cost, plug-and-play for basic segmentation | Limited features, inconsistent vendor updates, weaker VPN/IPS options | Quick wins, non-technical users, very small setups |
The common thread is this: pick a path you’ll actually maintain. If you won’t touch it for months, the weakest link becomes a real risk.
Practical improvements you can make in a weekend
- Start with inventory. List every device in your home lab: where it sits, what it does, what credentials it uses, and which data it touches. If you find something handling secrets or tokens on a dev workstation, move those secrets into a dedicated vault (even a simple local vault) and keep the machine in the Admin zone isolated from other zones.
- Separate admin devices from work devices. Your regular laptop should live in Zone A, not Zone B. Use a dedicated admin machine for server maintenance and sensitive tasks.
- Isolate IoT by default. Do not allow IoT devices to reach your admin or work subnets. If a device needs a path to the Internet, constrain it to that path only.
- Rotate and minimize data exposed across segments. If a service needs to talk from Workloads to Admin, give it a controlled, auditable path and limit it to the minimum ports and protocols necessary.
- Test frequently. After changes, perform a quick scan with Nmap from each zone to ensure no unintended paths exist. Keep a log of what’s allowed and what’s blocked so you can track drift.
What changed in the context of recent tech news
- The token-stealing VSCode bug reminds us that workspace-level credentials aren’t just “cloud credentials” anymore. They live on machines. If those tokens can be accessed from a workstation that sits in the same flat network as a Git host or container registry, segmentation is a practical safe-guard. A breach in one zone shouldn’t automatically mean a breach in another.
- Cloud trust concerns reinforce a basic truth: even if you trust a cloud provider, your own network should enforce the boundary. A robust segmentation model prevents a compromised device from dragging your private data into the wrong place, even if some cloud service is compromised or misconfigured.
- AI tooling can amplify risk. Automated agents run on your workstation, spin up containers, and access secrets. Without zone-based access control, those agents can become a vector into your most sensitive assets.
This isn’t a theoretical exercise. It’s a concrete defense pattern you can implement today, at modest cost, to gain real-world protection against the kinds of misconfigurations and token leaks we keep hearing about.
A compact plan to get started (30 days)
- Week 1: Design your zones, map devices, and decide on your firewall path (pfSense/OPNsense vs nftables). Gather a spare PC or repurpose an old router with VLAN capability.
- Week 2: Build the firewall with your chosen path. Create three VLANs/subnets, and draft a default-deny policy with explicit allow rules. Implement VPN access for admin-only devices.
- Week 3: Move sensitive services into Zone B (Workloads) and isolate Zone A from IoT. Start with a small service (e.g., a private Git repo or a small web app) behind a firewall rule that only admin machines can reach.
- Week 4: Add logs and monitoring. Use pfSense/OPNsense or Linux logging to collect firewall events. Validate with regular scans and adjust rules to minimize false positives while maintaining security.
If you want a sounding board or a sanity check on a ruleset, ping me. I’ve moved from “security by obscurity” to “explicit boundaries,” and the difference is palpable.
Actionable conclusion
Recommended products & services
Jellyfin
| Product | Notes | Link |
|---|---|---|
| Jellyfin | Link | |
| Emby | Link |
Backup
| Product | Notes | Link |
|---|---|---|
| Backblaze B2 | Affordable offsite object storage | Link |
| Wasabi | Affordable offsite object storage | Link |
Gpu Hosting
| Product | Notes | Link |
|---|---|---|
| Paperspace | GPU cloud for model training and inference | Link |
| Lambda Labs | GPU cloud for model training and inference | Link |
Segmentation is the practical line between your home-lab ambitions and a real compromise. It doesn’t require a ton of money, but it requires intention. Start with three zones, implement a default-deny firewall, and test the actual flows you need. Then, iterate: if a service needs access across boundaries, give it only the minimum required ports and verify it with logs.
In a world where cloud trust is fraying and local environments host tokens, containers, and automation, segmentation isn’t a luxury. It’s your first line of defense—and it’s within reach this weekend.
If you want a quick-start checklist, here it is:
- Map devices to zones (Admin, Workloads, IoT).
- Install a firewall with VLAN support (pfSense/OPNsense or nftables-based Linux).
- Implement default-deny between zones; only allow necessary flows.
- Add logging and regular audits of rules.
- Test with network scans and container isolation checks.
Take one weekend, get your firewall in place, and you’ll sleep better knowing the blast radius of any future breach is, at the very least, contained.
Links to the relevant news items for context:
- Gmail thinks I’m stupid, so I left: https://moddedbear.com/gmail-thinks-im-stupid-so-i-left
- 1-Click GitHub Token Stealing via a VSCode Bug: https://blog.ammaraskar.com/github-token-stealing/
- MAI-Code-1-Flash: https://microsoft.ai/news/introducingmai-code-1-flash/
- CT scans of BYD car parts: https://www.lumafield.com/scan-of-the-month/byd
- Use your Nvidia GPU's VRAM as swap space on Linux: https://github.com/c0dejedi/nbd-vram
- Trump signs downsized AI order after weeks of reversals: https://www.politico.com/news/2026/06/02/trump-signs-downsized-ai-order-00946389
Note: The goal here is practical, not just theoretical. If you’re in, describe your current lab topology and I’ll tailor a three-zone rule-set for your exact network gear.